NiftyImages + Braze Integration Guide
Overview
Once connected, teams can:
- Sync existing Braze personalization variables directly into NiftyImages
- Build dynamic content using real subscriber data
- One-click publish finished assets into Braze Content Blocks
- Reuse dynamic content across campaigns, templates, and automated flows
- Avoid manual copy/paste workflows and merge tag errors
Main Features
1. Contact Variable Sync
Use your existing Braze contact properties directly inside NiftyImages without recreating or manually remapping customer data.
What this accomplishes
After connecting Braze:
- Existing Braze personalization variables automatically appear inside the NiftyImages editor
- Teams can personalize:
- Images
- Countdown timers
- Maps
- Calendars
- Scratch-offs
- Dynamic text
- Loyalty progress bars
- Charts & graphs
- And more
Benefits
- No manual merge tag typing
- Reduce personalization errors
- Use the exact fields already configured in Braze
- Faster campaign production
- Easier collaboration across teams
2. Braze Content Blocks
One-click publish assets directly into Braze as reusable Content Blocks.
What this accomplishes
Once a NiftyImage is complete:
- Push it directly into Braze
- Reuse it across:
- Marketing emails
- Email templates
- Campaigns
- Shared brand assets
Benefits
- No manual HTML copy/paste
- Centralized content management
- Faster deployment across campaigns
- Easier updates and version control
- Ideal for agencies and multi-brand teams
Setup Instructions
Step 1 — Open Integrations
Inside NiftyImages:
- Navigate to Integrations
- Locate the Braze integration
- Click Connect
The integration screen explains the available features and connected accounts.
Click Connect Braze
Step 2 — Connect Your Braze Account
Click:
Open your Braze Account
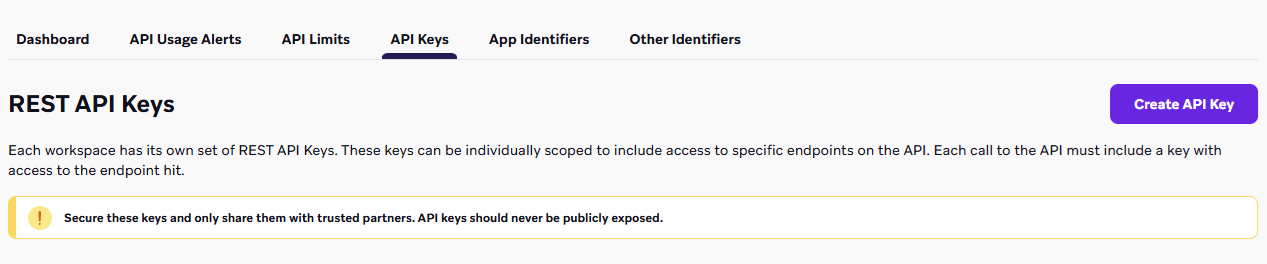
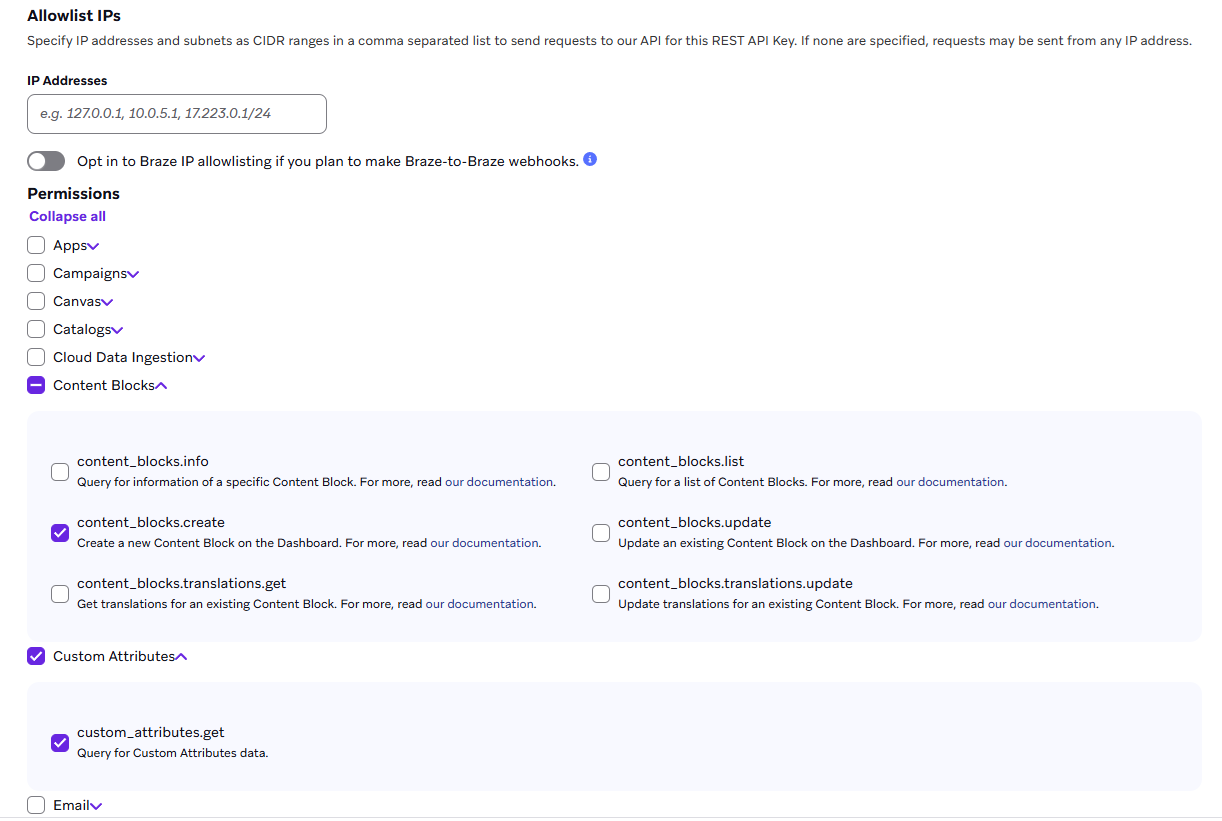
Braze authenticates with a REST API key (there’s no OAuth).
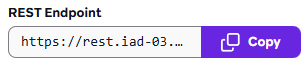
Under Settings → APIs and Identifiers with the custom_attributes.get and content_blocks.create permissions, then paste it along with your instance (REST Endpoint) inside NiftyImages
Step 3 — Approve Access
Authorize the requested permissions inside NiftyImages.
Once complete:
- Your Braze account will appear under Connected Braze accounts
- Status will display as:
- Active
- Connected
You can connect multiple Braze accounts if needed.
Using Contact Property Sync
Step 1 — Create or Edit an Image inside NiftyImages
Create a Personalized Image.
Step 2 — Access Braze Properties
When editing or adding merge tags:
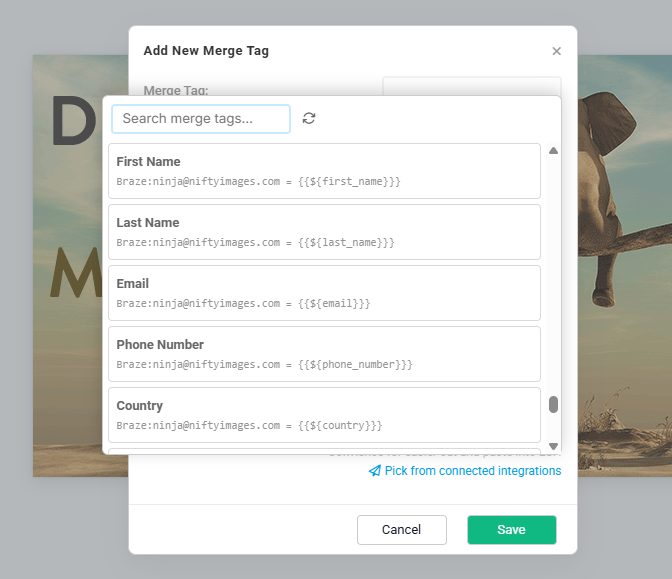
- Your Braze personalization variables automatically appear in the picker
- Select variables directly from the interface
Examples:
- First Name
- Loyalty Points
- Delivery Date
No manual merge tag formatting is required.
Step 3 — Save Your Image
Any saved images using these merge tags will automatically include your Braze personalization variables in the Image URL.
Using Braze Content Blocks
Step 1 — Finish Your Asset
Complete your NiftyImage design.
Step 2 — Publish to Braze
Click the publish option inside NiftyImages.
Select:
NiftyImages will automatically create a reusable Content Block inside Braze.
Step 3 — Use Inside Braze
Inside Braze:
- Open a marketing email
- Add Personalization
- Select Content Blocks to add a NiftyImages asset
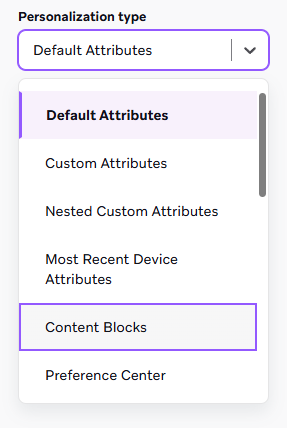
The content is now reusable across future emails.
Disconnecting an Account
At any time:
- Return to Integrations
- Open the Braze connection page
- Click the remove/disconnect icon
Disconnecting:
- Revokes the OAuth token
- Removes NiftyImages access
- Stops synchronization immediately
Best Practices
Recommended Workflow
- Connect Braze
- Create reusable branded assets in NiftyImages
- Use synced personalization properties
- Publish to Braze Content Blocks
- Reuse assets across campaigns and templates